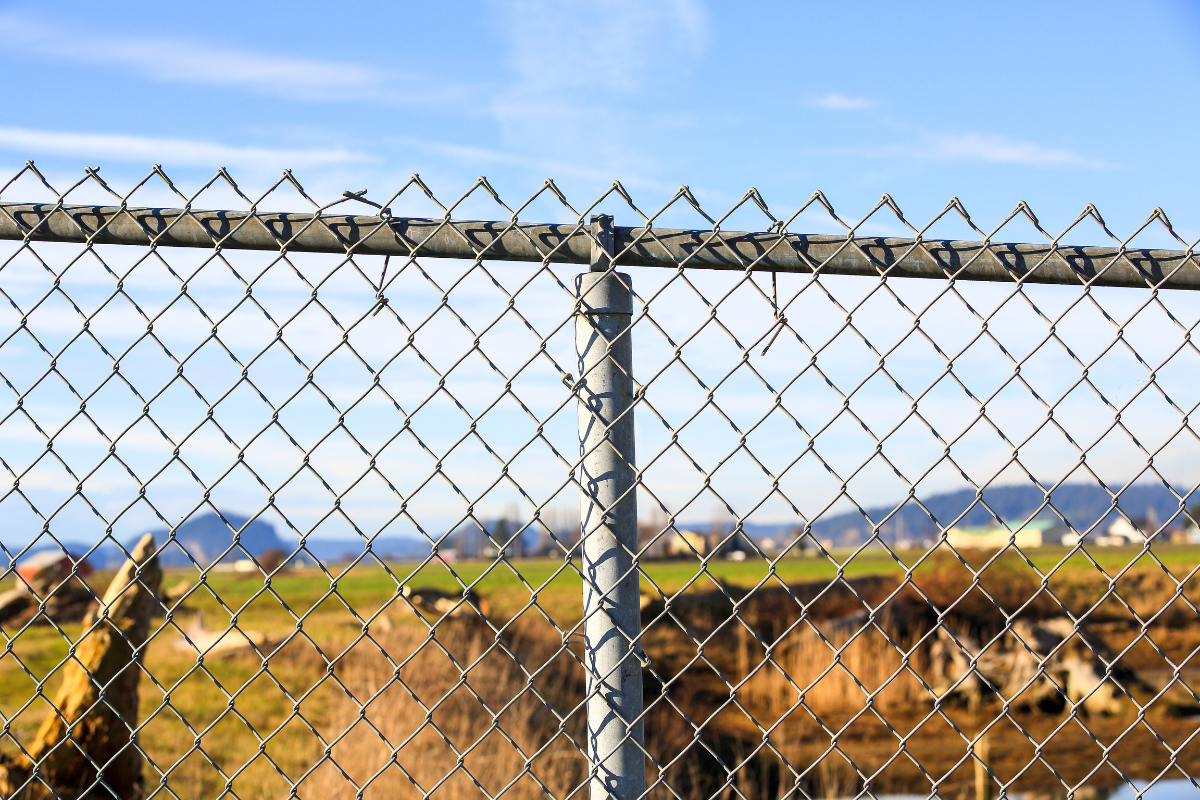
Chain link fencing earns its keep quietly. It marks property lines, keeps pets in and foot traffic out, and does it without drawing attention to itself. The value shows up when something goes wrong and the gate sags, a post heaves, or a panel buckles after a storm. Durable fences fail in predictable ways, and with the right method you can bring a tired stretch of chain link back to full strength without replacing the whole run. After two decades of working with homeowners, facility managers, and small municipalities, I can tell you what holds up, what wastes money, and how to tell the difference.
This guide walks through the typical failure points, how to diagnose them, and the repair strategies that actually last. It also explains when to stop patching and call for new chain link fence installation, and what to expect from a qualified chain link fence contractor or chain link fence company if you decide to bring in help.
Why chain link fails, even when it was installed correctly
A well-built fence starts strong. Terminal posts sit in concrete below frost line, line posts are spaced right, fabric is stretched to the correct tension, and the gate frame is square. Time, movement, and chemistry start nudging things off center. The fence rarely fails wholesale; instead, small weaknesses show up as symptoms.
Soil shifts. In climates with freeze-thaw cycles, the top couple of feet of ground expands and contracts all winter. Posts that aren’t set below that zone rise a fraction of an inch at a time. In soft or fill soils, posts can lean as rain compacts the subgrade. Wind loads do the rest, especially on taller privacy slat projects that add sail area to a fence designed for airflow.
Water attacks metal differently depending on coating. Galvanized fabric withstands hot-dip rust better than electroplated wire, and vinyl-coated fabric adds a layer of protection. Salt from coastal air or de-icing operations accelerates corrosion on bottom rails and ties. The lowest six inches of fabric take the worst of splashback and mower rash.
Human activity wears gates more than any other component. Gate posts and hinges bear repeated lateral load. The top rail and brace bands take stop-and-go impacts. A gate that needs a strong hip bump to latch is a fence telling you it is out of alignment and wearing itself out.
Understanding these patterns lets you fix causes rather than symptoms. A patch that ignores soil movement or poor drainage will fail again. A repair that restores tension, protects against moisture, and supports moving parts buys years, not months.
The anatomy of a reliable repair
Before you pick up a come-along or cut a new section of fabric, take stock. Stand back and look down the length of the fence. You’re looking for a smooth sightline, consistent post spacing, and uniform fabric tension. Then work close: tug the fabric between each pair of line posts, check every connection point with a gloved hand, and put your level on suspect posts.
Repairs that last share four traits.
- They address structure first. Posts and rails hold the geometry. If they’re wrong, nothing tightens right, and fabrics overstress. They restore proper tension. Chain link works like a net. Too loose, and it sags. Too tight, and it pulls posts out of plumb. They replace corroded hardware, not just the obvious pieces. A single failing tension band or brace carriage bolt will unravel a section under load. They protect the repair. Cold galvanizing compound on cuts and new hardware, drainage clearance at the base, and gravel backfill where needed all extend service life.
Priorities by symptom
Different symptoms point to different root causes. Fix the right thing on the first try, and you save a second trip.
Sagging fabric between posts usually means loss of tension. This can come from broken tie wires, a missing or bent tension bar, or a top rail that has slipped out of a coupling. If the fabric is intact, you can often re-tension by reweaving a single wire, reinstalling the tension bar at the terminal, and pulling the fabric tight with a come-along and a fence puller. Replace broken ties with aluminum or stainless in salt-prone areas. Space ties no more than 12 inches on center along the top rail, closer if you have wind load from privacy slats.
A leaning line post reflects soil or footing failure, not the fence. If the lean is minor and the concrete is solid, you can sometimes true the post with a jack, then brace it while you tamp additional gravel around the concrete plug to lock it. When the concrete footing is lifted or cracked, dig around the plug, remove it, and re-set the post. Set the new footing to the local frost depth, usually 24 to 48 inches, and bell the bottom wider than the top so frost can’t lift it. Don’t just pour a thin collar at grade. It looks tidy and does almost nothing.
A gate that drags or won’t latch indicates misalignment. Check the gate post for plumb and hinge wear. If the gate frame itself is racked, a turnbuckle-style gate brace cable will draw it square again. If the hinges have ovaled out the mounting holes, replace the hinge assembly and through-bolt where possible. Make sure the latch post is set firm before you adjust keepers or latch tongues. Adjusting hardware on a moving target is like chasing a shadow.
Bottom rail rust and torn fabric at the base relate to maintenance and materials. Weed trimmers cut tie wires and nick galvanizing, which opens the door to rust. If you see rust spots or broken bottom ties, cut out the affected fabric and splice in a new section. A mid-span splice uses the “unweave and reweave” method: spin out one spiral wire, slide the new panel in, and reweave the spiral to connect both edges. Treat every cut with a cold galvanizing spray, then paint if you have vinyl-coated fabric to match the color.
Storm-bent top rail or creased fabric is common after falling branches. Replace entire sections of top rail between couplings rather than trying to straighten kinks. Kinks have already work-hardened the metal and will crack under load. If fabric is creased but intact, you can sometimes hide it with re-tensioning. If the crease distorted the mesh, replace the panel for a clean line.
Techniques that pay off over years
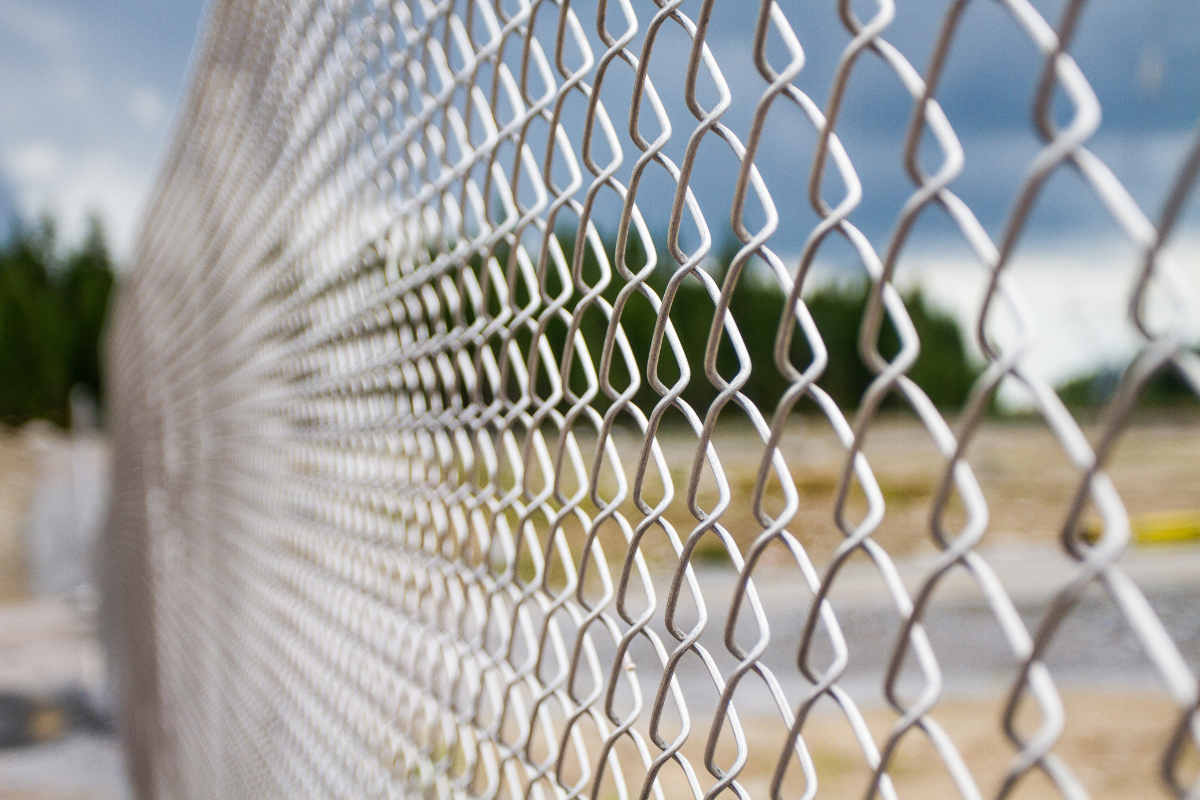
Stretching fabric properly matters more than any other single step. The goal is firm, drum-like tension without pulling posts. On a typical residential 9-gauge fabric, you want tension that keeps the mesh straight with about a half-inch of give under a firm hand pull. Use a come-along and a stretcher bar that grabs the full height of the fabric, not a few grippers that load individual wires. Strap the stretcher bar to a temporary pull post if your terminal post is suspect; pulling against a loose terminal damages it further.
Use the right tension bar position. At terminals, the tension bar should sit on the inside of the fence for security applications, held by at least three tension bands for residential heights up to 4 feet, more as height increases. On a 6-foot fence, I use five bands. Hardware spacing distributes force and reduces fabric racking.
Mind the bottom clearance. Fabric should hover about 2 inches above grade on lawns to prevent wicking corrosion and allow mowing. In containment situations, drop it closer and use tension wire or a rail. If you add a bottom tension wire, use 7-gauge coated wire and hog rings every 18 inches. In high-dog-energy yards, closer spacing keeps noses from creating escape routes.
Protect steel after you cut it. Every field cut through galvanizing or vinyl coating is a future rust site if you leave it raw. Wipe clean, hit it with cold galvanizing compound, and, for vinyl-coated systems, topcoat with color-matched paint. This adds five to ten years of clean service in most environments.
Replace cheap tie wire with material suited to the environment. Aluminum ties cost a little more but hold up far longer around pools and coastlines. In municipal yards exposed to salt trucks and winter brine, stainless ties avoid recurring corrosion.
For post replacements, set the footing right. I prefer wet-set methods with pre-mixed concrete on small jobs. In expansive soils, add clean gravel at the base of the hole and install a sleeve drain to daylight if water collects. On security fences or high-wind sites, I bell the footing and install a short section of rebar as a dowel through the post, locked into the footing, to resist rotation. Small touches like doming the top of the footing away from the post keep water from pooling and rusting the post base.
On gates, upgrade hinges when you repair. A malleable iron butt hinge on a 6-foot chain link gate that sees daily use will outlast a stamped hinge many times over. Greaseable hinges earn their keep on commercial gates. Hang the gate with the hinge pins oriented up to down on the top hinge and down to up on the bottom hinge, a simple anti-lift practice that discourages casual removal.
Repair versus replace: where the line usually falls
Not every tired fence deserves a new life. Some conditions tell you to stop patching.
If the fabric is thin and red-brown across most of the surface, the zinc is gone and the steel is oxidizing. You can chase holes for a year, or you can budget for new fabric. On a standard backyard, a panel replacement takes roughly an hour per 10-foot section with two people once posts and rails check out. Labor often eclipses material cost when you chase many small patches.
If more than a quarter of posts lean or show footing failure, re-set them. Reusing rails and fabric on a new line of solid posts is efficient, but be honest about fabric condition first.
If the fence height is mismatched to the job, do not pour repair money into the wrong solution. I have removed plenty of 4-foot chain link fencing that never kept a determined dog in or a basketball out of a yard. If you need 6 feet and privacy slats, plan that upgrade rather than building a perfect 4-foot fence.
If the gate gets used intensively, consider replacement hardware even if it technically still works. A gate that closes with a finger tap and latches true is safer and saves hinges, posts, and tempers.
Planning for the environment you actually have
Regional context shapes smart repairs. In frost-heavy areas, depth and drainage matter more than the PSI rating on your concrete. In coastal towns, coating choice outweighs almost everything else. In wildfire regions, vinyl coatings melt and deform. In urban alleys, impact resistance trumps perfect aesthetics.
Along coastal corridors, I tend to specify vinyl-coated fabric over galvanized core, schedule 40 posts for gates and corners, and aluminum ties. I also specify stainless or hot-dipped hardware. A chain link fence company that works on the coast has https://www.google.com/maps?cid=2241039838275878048 the right inventory on the truck. Inland, where budgets stretch further and corrosion is slower, standard galvanized components perform well for decades if installed correctly.
For properties with deferred maintenance, I focus first on restoring structure and safe gate function. It is tempting to replace slumped fabric first because it is visible. Fixing posts and rails, then tension, produces a fence that works and often looks better immediately, even before you swap in any new fabric.
Working with a chain link fence contractor
If you decide to hire out the work, you should expect a straightforward process. A reputable chain link fence contractor will ask how the fence is used, not just how it looks. Pets, kids, equipment, wind exposure, and soil conditions drive different choices.
They should inspect in person, check post plumb, footing depth where feasible, measure tension, and point out corrosion. Ask what they see as root causes and how they plan to address them. If the answer is just “replace the fabric,” keep asking. Fabric is rarely the only issue.
Expect a clear scope that calls out component grades. Schedule 40 or SS20 posts, 9-gauge versus 11-gauge fabric, hot-dip galvanized hardware, hinge type, latch type, and any coatings should be spelled out. Vague material descriptions often hide cheaper components that fail early.
Pricing transparency helps you decide. For reference, on residential projects in most markets, a straightforward repair that includes re-tensioning, a few post resets, and a gate hinge replacement typically ranges from a few hundred dollars for a small area to a couple thousand for a long run with multiple posts. Replacing continuous fabric can add several hundred per 50 feet depending on height, gauge, and coating. Commercial yards, taller heights, and security features scale from there.
A good chain link fencing company will warranty both materials and labor for a fair period, commonly one to three years on repairs and longer on new installs. They should also coach you on maintenance so you get the full value from the work.
When safety and security are non-negotiable
Repairs on security or controlled access sites have different stakes. If you manage a utility yard, school, or logistics facility, treat any breach as a priority. In my experience, the fast, lasting fix beats the fastest possible fix that fails soon after.
On high-security stretches, replace damaged fabric with the same height and gauge, maintain or add bottom tension wire or rail, and confirm that barb arms, if present, are intact and properly angled. Re-tension the entire bay between terminals instead of patching a small hole mid-span. Patches inside planes of security fabric are often targeted again, especially if they look new and obvious.
Document each repair. Photos and notes about component grades and techniques matter to auditors and risk managers, and they keep you from reinventing solutions when a similar failure happens on another side of the property.
The small habits that extend fence life
Most fences do not fail suddenly. They telegraph problems months before a panel tears or a gate drops. A quick seasonal walkthrough prevents most big-ticket repairs.
Walk the line after winter. Look for post movement, frost heave gaps, and loose ties. If you can slide a gloved hand under the bottom of the fabric in places where it used to be tight to grade, you have movement to address.
Trim vegetation kindly. Keep shrubs off the fabric and teach crews to avoid weed trimmer contact with the fence base. A protective mow strip, like a 6 to 12 inch band of gravel or pavers, solves a lot of damaged tie wire and rusted bottoms. It also improves drainage.
Keep gates honest. If a gate needs force to close, or if the latch misses by half an inch some days and not others, check it. Adjust the latch, square the frame, or reset the post before wear migrates to multiple parts.
Wash salt. In areas that use road salt, spray down the lower fence after the heaviest salting periods. It is a simple step that makes a measurable difference on hardware life.
Mind add-ons. Privacy slats, windscreen, and signage increase wind load. If you add them, upgrade tension wire, confirm post depth, and tighten fabric. After large storms, inspect for stretched panels.
A disciplined approach to DIY repairs
Many owners prefer to handle small repairs themselves. With a few specialized tools and patience, you can deliver professional results.
Here is a compact workflow that avoids the missteps I see most often.
- Diagnose structure first. Check post plumb, footing integrity, and rail continuity before touching the fabric. Fix posts and rails, then retension fabric. Use a full-height stretcher bar. Avoid clamp-style grippers that deform mesh. Pull with a come-along anchored to a solid terminal or a temporary deadman. Reweave, don’t overlap. Cut out damaged fabric cleanly. Unwind a single strand, slide in the replacement panel, then reweave. Crimp and seal cut ends with galvanizing spray. Replace aging hardware in clusters. If one tension band has failed from corrosion, the rest are on the same clock. Replace bands, carriage bolts, and ties together on that bay. Protect every cut and upgrade contact points. Cold galvanize raw steel, use aluminum or stainless ties where corrosion is a risk, and add a bottom tension wire if pets or wind exploit gaps.
Expect the first section to take the longest. Once you get a feel for tension and hardware spacing, progress speeds up. Working with a second person is not optional when stretching fabric; it is the difference between safe and risky.
Material choices that earn their keep
Gauge and coating type matter more than marketing. If you want repairs to last and match your fence, know what you’re working with.
Standard residential chain link fabric is 11 or 11.5 gauge, galvanized. Heavier 9-gauge fabric resists deformation and holds tension better, which is why it shows up on ball fields and commercial yards. Vinyl coating adds corrosion resistance and a finished look. Black and green are common, and both hide repairs better than bare galvanizing once you touch up cuts correctly.
Posts and rails come in different wall thicknesses and steel grades. Residential jobs often use SS20 or lighter posts; corners and gates deserve schedule 40. If you are resetting or replacing posts, match or exceed the heaviest post on the run at corners and gates, because those take the highest loads. For top rails, sleeved connections outperform swaged ends in high-movement areas because the couplings spread bending stress.
Hardware is small but decisive. Hot-dip galvanized bands and bolts outlast electro-galvanized. For hinges, look for solid barrels and grease fittings on busy gates. For latches, simple gravity latches last, but self-closing or lockable latches serve where access control matters. A chain link fence contractor worth the fee will spec these details correctly based on use.
Real-world examples and what they teach
A community pool we service sits a mile from the ocean. The original fence had galvanized fabric, standard ties, and light hardware. Eight years later, the bottom 18 inches of fabric showed pinhole rust and the gate hinges seized every spring. We replaced the gate assembly with schedule 40 posts, installed stainless hinges and latch, swapped ties for aluminum, and cut out and rewove the bottom two courses of fabric with vinyl-coated panels. We also added a crushed stone mow strip. That work took a day and a half and stopped the annual hinge and tie replacement cycle. Seven seasons on, the fence doesn’t ask for attention.
A warehouse yard added windscreen to hide inventory. The first storm stretched panels and tipped three posts. We reset those posts deeper with belled footings, added a mid-span brace rail where the run exceeded 100 feet without a terminal, and tightened the fabric. We also reduced windscreen coverage from full to 70 percent in the most exposed run. The yard kept the privacy it wanted, and the fence stayed up through higher winds the next year.
A homeowner called about a dog that started tunneling. The bottom of the fabric floated above some low spots, and the dog learned fast. We added a bottom tension wire, closed the float to an inch, and pegged the wire to the ground with short galvanized staples where grade dipped. The digging stopped. The fix cost far less than a new fence and took an afternoon.
Each case shows the same pattern: understand loads, restore structure, use the right materials, protect the work.
When chain link fence installation is the smarter move
Repairs make sense until they don’t. If you see any combination of these conditions along most of a fence line, plan for replacement:
- Fabric thinning and widespread rust beyond isolated spots. Multiple posts with heaved or cracked footings, especially at corners and gates. Height or configuration mismatch with current needs, like adding privacy slats to a fence that was never designed for that wind load. Repeated gate failures caused by undersized hardware and soft posts.
A new line lets you correct past compromises: proper post depth, heavier gauge fabric, vinyl coating where corrosion is a factor, and hardware chosen for use, not only cost. A chain link fencing company will help you weigh these choices against budget and timeline.
Choosing chain link fencing services that stand behind the work
If you bring in pros, look for signs that they’ve solved problems like yours before. Trucks should carry stretcher bars, come-alongs, assorted band sizes, and replacement rails, not just posthole diggers and fabric rolls. Crews that repair as well as install notice details and work efficiently because they understand how things fail.
Ask for a short debrief at the end of the job. A good crew lead will walk the line with you, explain what they fixed and why, and point out any watch points for the next year. That knowledge is part of what you pay for, and it saves you money later.
The quiet payoff
A sound fence fades into the background again and does the simple work you hired it to do. The right chain link fence repair restores that quiet reliability. Address structure, tension, hardware, and protection, and you’ll stop chasing the same issues every season. Whether you handle it yourself or lean on experienced chain link fencing services, insist on methods and materials that match your site and use.
Chain link has earned its reputation because it forgives small mistakes and still stands a long time. Give it a thoughtful repair, and it repays you with years of low drama and low cost. That’s the kind of reliability most properties need, and the kind worth investing in.
Southern Prestige
Address: 120 Mardi Gras Rd, Carencro, LA 70520
Phone: (337) 322-4261
Website: https://www.southernprestigefence.com/